The Anatomy of a Fake Wylde Audio Guitar - Part 2
In this multi-part blog series, we're going to take a look at the differences between a real deal Wylde Audio Odin Grail, produced by Schecter and one of the many knock-offs that have flooded the market.
6/19/20255 min read


Part 2 - External Comparison
In this post, we're going to take a look at what visually is different between an authentic Wylde Audio and a fake. If you had one in your hands, what could you look for to help you make an informed decision to pull the trigger or not? This post will help!
Why does this happen? The recipe is simple:
1 rock idol
1 identifiable signature guitar
A fan base that's inclusive of new guitarists
A gap in price between affordable and expensive
Throw it in a blender and you get a replica saturated market. Each new acquirer of that guitar, under the belief of its authenticity or not, is subject to being ripped off. Sometimes intentionally and sometimes through ignorance.
Summary
As you can see, there's certain details of this guitar that can immediately flag it as a fake, but it is usually going to be a collection of individual signs that point you in one direction or another. If you have any doubts lean towards it being a replica or send me an email at kirk@thealtoonaguitarco.com or fill out the form at the bottom of this page. I'd love to help!
That's the point behind this blog series.
Past posts in this series:
You are here...
Part 2: External Comparison - visually, if you had this in your hands in the store, what are some of the obvious signs to look for
Future posts in this series:
Part 3: Internal Comparison - if you have the opportunity to peek into the control cavities, what should you find?
Part 4: Under the Hood - we're going to strip this guitar down to see what we find. Are the stripes decals? Is it just a printed graphic veneer?
Part 5: Rebuilding - I'm going to be doing some damage in Part 4, but I'm going to build it back up to make it playable again, if not entirely better than it originally was.
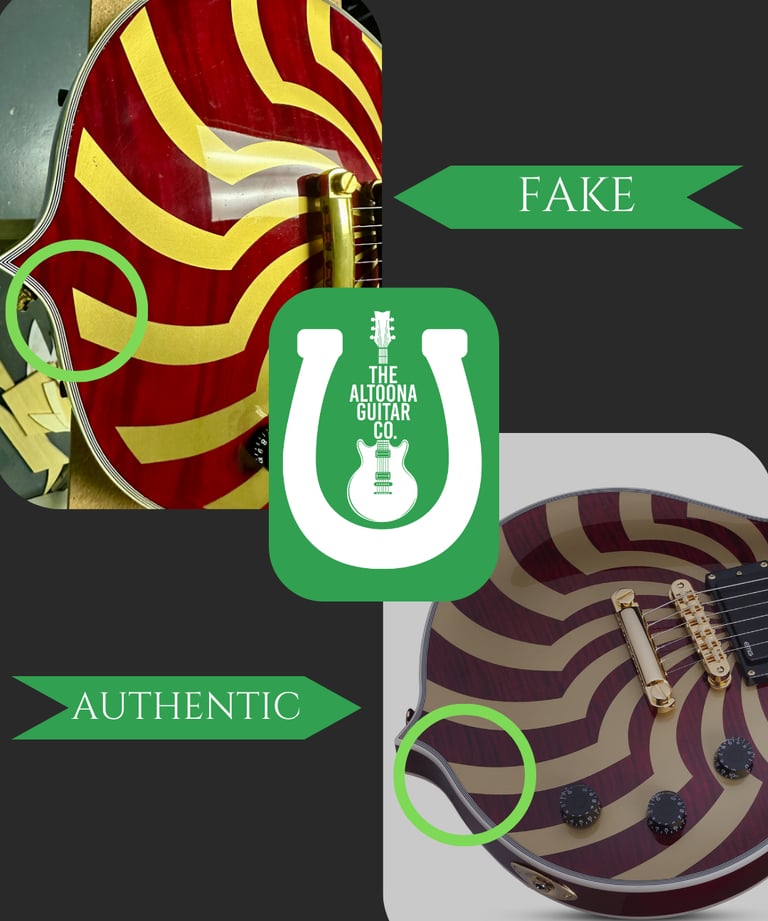
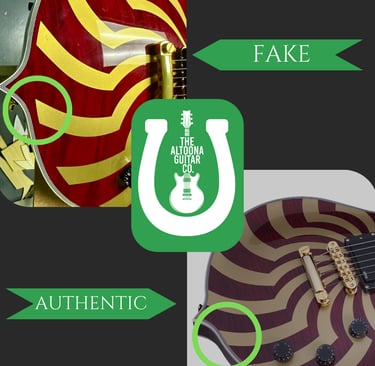
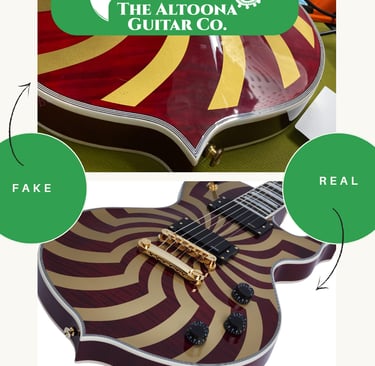
Graphic Orientation and Positioning
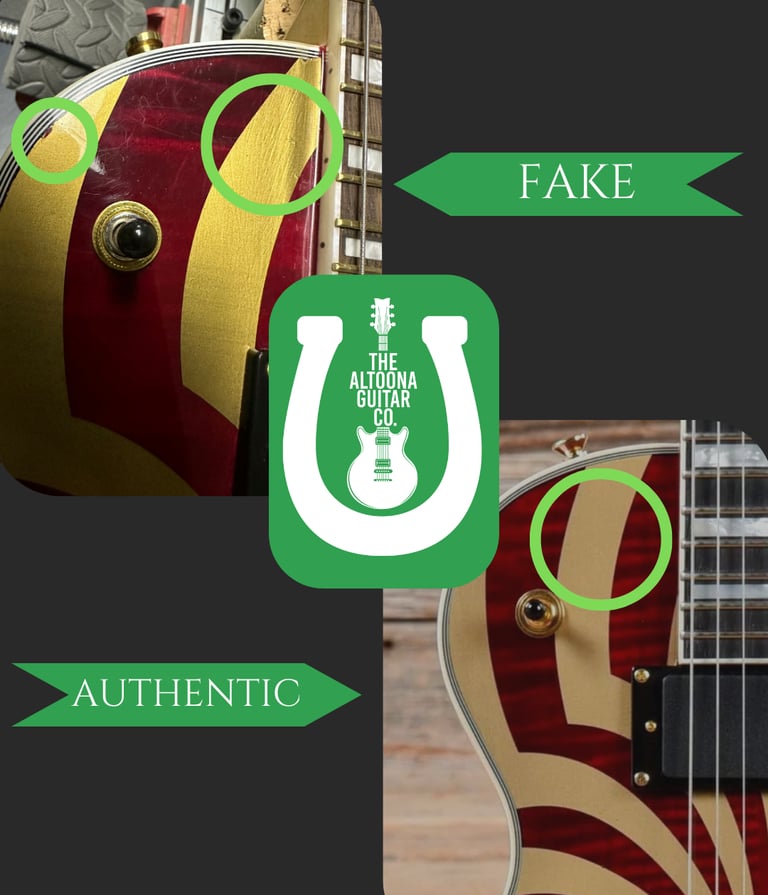
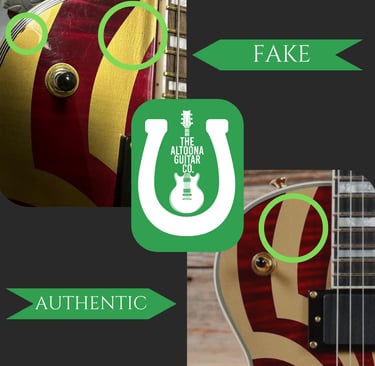
Speaking of first things first, with this guitar - the first thing you notice is the graphic. We're specifically looking at the Odin Grail with the buzzsaw graphic, though most of this will apply to the bullseye variant - both instantly associated with Zakk Wylde through history. This fact alone makes them some of the most popular guitars to rip off.
The first generation of these guitars - which are more Gibson-esque w/ their carved bodies, edge purfling and binding, have a few colorway variants. Gen 1 only featured the buzzsaw in Crimson and Gold while also offering the bullseyes in Gangrene Pelham (blue and black), Genesis (cream and black), and Raw Top (natural wood and black). You'll likely also be able to recognize this generation due to the block inlays that run up the neck as opposed to the "rune" inlays.
What to look for:
Do the stripes run all the way to the edge of the guitar, butting right up to the binding or is there a gap between the graphic and binding? It should extend all the way to the binding.
The stripes should appear consistent and smooth. They're sprayed on. They aren't brushed on, so you shouldn't see any brush marks and they aren't decals, so you shouldn't see any decal/transparency material.
The orientation/rotation of the stripes is consistent from authentic guitar to guitar, meaning they're all the same. If you compare one to the graphics on the Schecter website, the stripes should all end at the same points around the edge of the body. If they appear to be rotated more, in different spots, or have a different thickness to them, don't buy it.
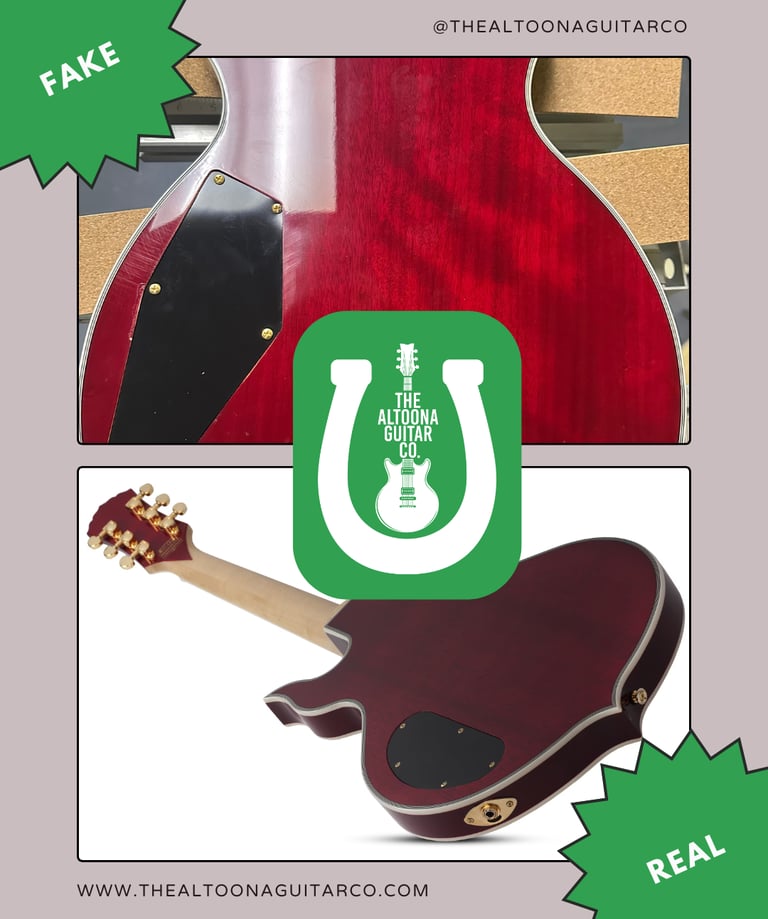
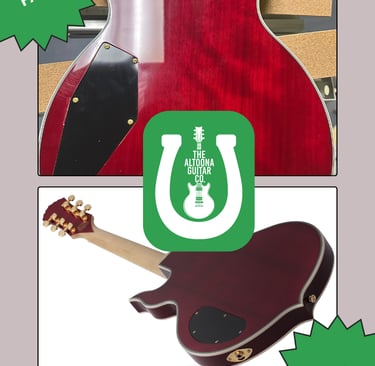
Rear Control Cavity
Some of the replicas have a cavity and cover shaped like a coffin instead of the expected kidney variant. Seeing the kidney shape doesn't guarantee it's real. Some produces of the fakes have this correct, but seeing a coffin is a pretty sure giveaway.
Output Jack
Another external checklist item to observe is the shape of the output jack plate. This fake has a square cover while the real ones have an oval plate. Again, seeing the latter doesn't mean it's necessarily real - just another tick in the "might be fake" column.

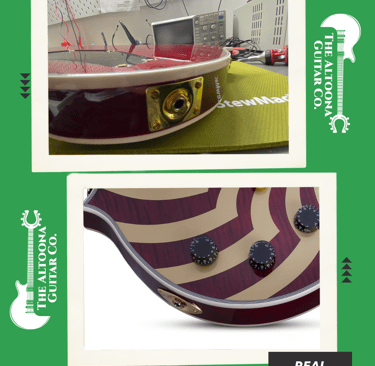
Bottom Strap Button Location
This fake had strap locks installed, but they come stock with standard gold strap buttons. Is it gold and is it in the correct location? The real version of this guitar features the button on the bass side of the bottom horn while the fake version had it on the treble side. Personally, I like it better on the treble side - it just seems like that positioning allows gravity to put tension on the bottom of the strap slot, securing it better than on top where the strap button's more prone to slip out of the strap's slot.

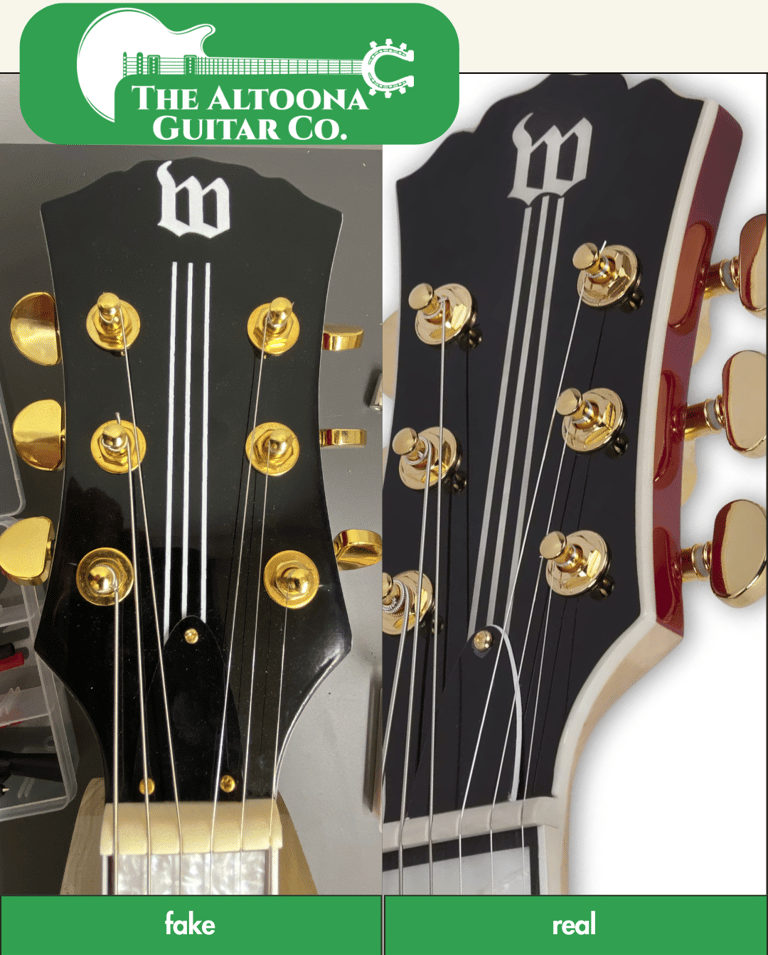
Headstock
There's a bunch to look at here. First, take a look at the truss rod cover. The fake has 3 screws and is more angular. The real one is a bit more of an arch and has just one screw at the top.
Now look at the logo. The 3 vertical stripes extend from under the truss rod cover all the way up to the brand logo - the real one has a very small gap at the top and the fake is pretty substantial and they all stop at the same point. Also, it's hard to tell with this picture, but the middle stripe is centered on the headstock, as is the screw holding the truss rod cover in place.
Look down a bit further and you should notice that the nut on the fake is more creme than white.
Also - again it's hard to tell in these pictures and will be hard to tell in real life without both side by side, but the gold hardware of the real one is more authentically gold instead of a brassy yellow.